
Getting Started with BreezeDoc
Get started with BreezeDoc: create your free account, upload a document, place signature fields, and send it for e-signature in a few minutes.
What is BreezeDoc?
BreezeDoc lets you send documents for electronic signature, reuse them as templates, and send invoices. Its main features:
- Documents - upload a PDF, Word, Excel, JPG, or PNG file and send it for signature
- E-signatures - place signature, initials, text, date, and other fields for each signer
- Templates - save documents you send often, or start from the template Library
- Activity tracking - see when each recipient viewed and signed
- Invoicing - create invoices and get paid through Stripe or PayPal
- Teams - share documents and templates with team members (Agency Plan)
Prerequisites
- Account: a BreezeDoc account (free to create)
- Plan: the Free Plan lets you send 10 documents per month; the Individual and Agency Plans add more (see below)
- Browser: a modern web browser (Chrome, Firefox, Safari, Edge)
Creating Your Account
- Go to breezedoc.com and click Register in the top menu.
- Enter your name, email, and password, and click Register →. Or click Register with Google to use your Google account.
- You are signed in right away and land on the Documents page.
Next time, click Login. If you forget your password, click Forgot your password? on the login page.
Finding Your Way Around
BreezeDoc's menu runs along the top of every page:
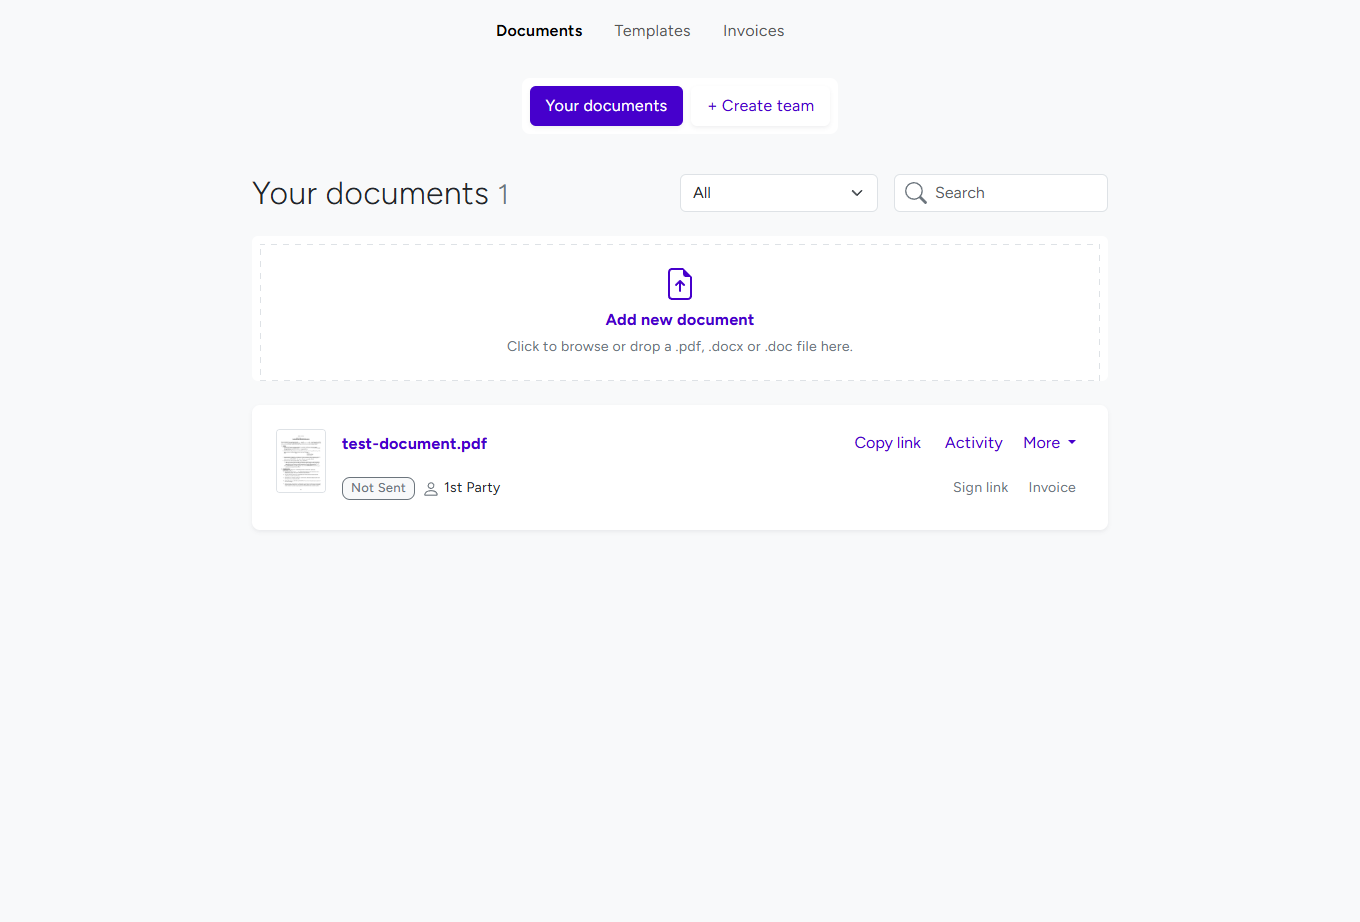
- Documents - every document you have uploaded or sent
- Templates - your templates and the template Library
- Invoices - the invoices you have created
- Your name (top right) - opens Settings: Account, Teams, Plan, Integrations, Payments, and Security
Quick Start: Your First Document

- Click Documents, then click Add new document to browse for a file, or drop the file on it. PDF, Word, Excel, JPG, and PNG files up to 5 MB are accepted.
- The document editor opens. Click a field type and place it on the page:
- Signature - an electronic signature
- Initials - the signer's initials
- Text - typed information
- Email - an email address
- Date - a date
- Checkbox - a yes/no choice
- Dropdown - a choice from a list

- When the fields are in place, click Send to signers in the top right and choose Send via email.
- On the Send for Signature page, enter each signer's Name: and Email:.
- Click Send for signature. BreezeDoc emails each signer a link to sign.
For each step in detail, see Create Your First Document: Upload a File or Use a Template and How to Send a Document for E-Signature in BreezeDoc.
Understanding Plans and Features
BreezeDoc has three plans. Paid plans are one-time purchases with lifetime access and a 60-day refund guarantee - there is no subscription.
Free Plan
- Cost: $0
- Documents: 10 sent per month
- Templates: unlimited
- Includes: e-signatures, multiple recipients, invoicing, passcodes
- Not included: reminders, customized emails, redirect after signing, API access; BreezeDoc branding on documents
Individual Plan
- Cost: $19 one-time (lifetime access)
- Documents: 20 sent per month
- Adds: automatic reminders, customized emails, redirect after signing, API access, reduced branding
Agency Plan
- Cost: $49 one-time (lifetime access)
- Documents: unlimited
- Adds: teams (up to 10 members), custom logo, no BreezeDoc branding
Compare the plans in detail in How to Choose the Right BreezeDoc Plan.
Key Features to Explore
Templates
Click Templates, upload a file, and place its fields once. Next time, click Use template to create a ready-to-send document from it. See Creating and Using Templates.
Activity Tracking
On the Documents page, click Activity next to a document to see when it was sent, viewed, and signed, and click Download PDF to save the activity log.
Invoicing
Click Invoices, then Create new Invoice. To accept payments, connect Stripe or PayPal in Settings → Payments.
Reminders and Custom Emails (Individual and Agency Plans)
On the Send for Signature page, tick Send reminders every three days (maximum 3), or tick Customize email to write your own subject and message.
Next Steps
- Send your first document using the Quick Start above.
- Browse the template Library under Templates.
- Connect Stripe or PayPal in Settings → Payments if you plan to send invoices.
- See your plan and usage in Settings → Plan.
Troubleshooting
I cannot send more documents
- You have used your monthly allowance - the Send for Signature page says "You have reached the maximum number (10) of sent documents this month allowed for your plan."
- See how many you have sent in Settings → Plan. The count starts again on the 1st of each month.
- For more, upgrade to the Individual Plan (20 per month) or the Agency Plan (unlimited) - see How to Upgrade Your BreezeDoc Plan.
My recipient did not receive the email
- Check the recipient's email address, and ask them to check their spam or junk folder.
- On the Documents page, click Resend next to the recipient's name.
My file is not accepted
- Upload a PDF, Word (.doc, .docx), Excel (.xls, .xlsx), JPG, or PNG file of 5 MB or less.
Still stuck? Email support@breezedoc.com.
Frequently Asked Questions
How many documents can I send on the Free Plan?
You can send 10 documents per month on the Free Plan. Uploading and preparing documents is not limited, and templates are unlimited on every plan.
Can I customize the email sent to recipients?
Yes, on the Individual and Agency Plans: tick Customize email on the Send for Signature page and write your own subject and message.
What is the difference between a document and a template?
A document is sent to recipients to sign. A template is a reusable document you use to create new documents quickly.
Is there a monthly subscription fee?
No. Paid plans are one-time purchases: pay once for the Individual Plan ($19) or the Agency Plan ($49) and keep lifetime access. Both include a 60-day refund guarantee.
Need more help? Contact our support team at support@breezedoc.com - we are here to help!